January 8, 2009
More Sale-A-Bration cards
I’m really enjoying playing with the Sale-A-Brations sets – I especially love the Botanical Blooms set as it’s great for creating pretty backgrounds. As you can see by the following cards, I’ve used the flowers to create an all-over background and then used it as a feature on the card.

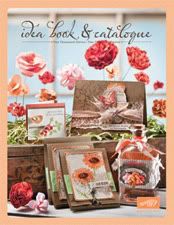
The colours and cardstock used are Ruby Red, Chocolate Chip and Wild Wasabi. I’ve used the Edge Scallop punch to create a lovely border on the Chocolate Chip cardstock and used three Old Olive brads in the top corner for interest. The stamp sets are: Botanical Blooms (available for free when you spend $100 as a customer), and Sincere Salutations (from the current 2008-2009 Idea Book & Catalogue).

I LOVE these earthy colours. I decided to try out the Kraft cardstock and I’m so glad that I did! It goes with almost everything and is very easy to match colours to – especially earthy tones.
For the above card, I used the Speckled Jumbo Wheel with VersaMark as a background and then layered some Afternoon Tea Designer Series Paper on Chocolate Chip cardstock and tied Chocolate Chip Taffeta ribbon around it. I randomly stamped the flower and leaf images from Botanical Blooms in Ruby Red and Wild Wasabi ink on Confetti White cardstock and then stamped the outline images over the top in Chocolate Chip and Always Artichoke. I then layered this on Ruby Red cardstock. I then stamped the saying from Botanical Blooms onto Confetti White cardstock, and punched it out with the small oval punch. Before adhereing it to a large oval of Chocolate Chip cardstock, I gently inked the edges with Chocolate Chip ink by ‘scraping’ the ink spot around the cardstock.

By keeping with the same colours, I’ve been able to create three or four cards that are all slightly different and yet keep a similar theme/feel to them. It’s also a great time saver if you make a couple of cards at the same time – you don’t need to make them all identical, be creative! Change a colour here, a background there… have fun!
For the above card, I’ve used the following inks; Ruby Red, Pumpkin Pie, Wild Wasabi, Always Artichoke (outline of leaves) and Chocolate Chip (for the saying). Cardstock; Kraft for the base card, Very Vanilla, Ruby Red and Chocolate Chip. I inked the edge of the Very Vanilla cardstock in a combination of Creamy Caramel, Close to Cocoa and Chocolate Chip to create depth of shading.
I mentioned the Stamp-a-ma-jig in a previous post, and I actucally used it here with these cards! It doesn’t look like it, but I wanted the outline image of the leaves to be slightly off-centre – but I wanted to control ‘how far’ off-centre they were. :o)
Also, don’t forget that when you’re using a Two-Step stamp set, it’s often very effective to “stamp off” some ink before you stamp the flower images. You’ll notice that some of the flowers appear darker than others and this is because I “stamped off” once onto scrap paper and then stamped onto my cardstock – this gives a fainter image. It’s a good idea to do this as it makes your completed card look more natural rather than having all the images exactly the same depth of colour. Experiment and try stamping off twice before stamping onto your cardstock.
Happy Stamping!

Leave a comment