July 2, 2012
Ronan’s 9th Birthday LEGO card!
~*~
Crikey! Our little boy turned nine last week!!!
He’s shot up recently too – but he still has his little boy cute cheeks. (I think we’re all cursed blessed with chubby cheeks – theirs look cuter than mine though – LOL.)
This is the card I made for him.
Poor Ronan has been sick recently – he’s had a bad run of tonsilitis, then a week later he had an upper respiratory chest infection and then just before he finished the antibiotics for the infection (and two days before his birthday), he suddenly came out in Hives!! All over. Litterally as I was watching, they were appearing. And so, hubby had to put our Pizza (Friday night Pizza and Movie Night!!) back in the oven so we could rush off to the local late night GP clinic. After a dose of Phenergan and Predmix, we came home, but within an hour he was asleep and missed the movie. He still had quite bad hives on his birthday and just wasn’t quite himself, but he was such a trooper about it and did the best he could. We had Gran and Nan over for lunch and cake during the afternoon and it was nice to spend the time together. He still came out in Hives yesterday quite badly but Phenergan works well.
Because of how much he’s been unwell, I’d totally forgotten left it to the last minute to make his card. His birthday crept up on us!! He’s had two weeks off school due to illness and I just didn’t plan. SO…. at the last minute, and because he LOVES LEGO so much, I did a quick search for Lego card ideas… the inspiration for my card comes from Marelle Taylor‘s wonderful Lego card.
Ronan just LOVED his LEGO card, he thought it was super cool. (Thanks Marelle! – you saved me!)
To make up for his not-feeling-so-great-birthday, we took him and two friends to see Ice Age 4 yesterday which was good fun!
Stamps: Happiest Birthday Wishes (Hostess only)
Inks: Black Staz-On
Cardstock: Pacific Point, Daffodil Delight, Garden Green, Real Red,
Others: Brights DSP paper pack, Crimper, Itty Bitty Shapes Punch Pack, Sponge Daubers, retired Sticky Cuts (number 9), Fine Supernova Glitter (Aqua)
~ Thanks for visiting ~
XX Julia.
June 8, 2010
So Tweet.
Here’s a cute card I made for my niece’s birthday. I LOVE the On Board So Tweet chipboard pieces.
Not much stamping here! I’ve used textured cardstock and Designer Series Paper to cover the chipboard – with Tombow Glue to glue it in place. The legs have been inked with Sponge Daubers in Chocolate Chip.
The colours are Regal Rose, Pink Pirourette, Pumpkin Pie and Chocolate Chip.
I can’t wait to see what the Deal of the Week is for tomorrow!! I almost want to stay up late to find out, but alas… I’m too sleepy. A sick little kiddlywink had me up last night attending to coughs and splutters and I’m feeling it now!
:o)
April 4, 2010
Easter Wishes!!
Happy Easter everyone!
The Easter Bunny visited us this morning, leaving sweet treats for the children down amongst the gum trees in our back block… what a lot of fun it was watching the children racing from tree to tree to see if there were any tiny eggs hidden in the undergrowth.
Earlier, we had a lovely lunch of Roast Lamb and yummy veggies (oohh I think I ate too much!!!) and we’re all ‘relaxing’ in our various ways – the children are outside playing, Shane’s in his shed and I’ve taken a quiet moment to upload some Easter cards…
Oh noooooo, now that it’s uploaded, I see that the photo quality isn’t as good as I thought – sorry ’bout that! *DOH!*
This card uses Wagon Full of Fun from the Summer mini (now retired), and the Bold Brights inks and cardstock – Real Red, Green Galore, Tempting Turquoise and Yoyo Yellow. Don’t you just love the glitter on the eggs? I’ve also embossed the top layers of cardstock with Polka Dots in the Big Shot.
This is such a cute duck. I’ve gone for a very clean and simple look here. Only Orange, Yoyo Yellow and Whisper White. I’ve coloured both the ducky and the eggs in the previous card with my Blender Pens and the ink pads.
I thought I’d use the Loads of Love accessories set and put a little pile of Easter Eggs on the window sill of the Window Dressing Hostess set. Cute.
GAH – the quality of the photos is awful! I’ll see if I can get better shots and edit this later for you.
Again, I’ve kept the design very simple and the colour scheme is minimal. If you can just make it out, I’ve embossed the Whisper White cardstock with Polka Dots. If you like the bow on the top right hand side, I learnt how to make it by following Teneale Williams’ instructions. You’ll have to check out her blog for her Tutorial on how she makes her perfect bows. Stunning!!
I hope you had a wonderful Easter Sunday and that the Easter Bunny brought you a little something too. Yum.
Julia. XX
March 30, 2010
Thanks For Everything
Farewell lovely stamp set!
“For Everything” is leaving us as the Summer Mini catalogue retires tomorrow. Such a pretty little stamp set.
The colours here are Old Olive, Pumpkin Pie and So Saffron, which are some of my favourite colours to play with right now.
XX
March 29, 2010
Heartfelt Thanks
I’ve shown this stamp set before, but I really do love it. What I especially liked about creating this card is that I’ve let the background stamp become my saying/greeting. The large background stamp is Tres Chic which I’ve inked with Pale Plum (the same as the cardstcok that I’ve stamped it onto.)
If you look very carfefuly you’ll see that I’ve sponged the edges of the Pale Plum cardstock to give it a softer feel – I love sponging the edges of cardstock… it just finishes it off and makes it look “complete”.
I coloured the rubber stamp image of the flower with my Markers (Pale Plum and Old Olive) before stamping, and then I’ve used my Stamp-a-ma-jig to carefully position the outline stamp (in Basic Black).
I’ve layered Pale Plum, Perfect Plum and Black cardstock to give a very elegant finish – and the half-back pearls which are adhered with Crystal Effects, complete it!
XX
March 28, 2010
Kids cards made easy!
We’re coming into the time of year when the children are invited to birthday parties by school friends, as well as our own family birthdays happening at this time of the year.
If you’re like me and struggle with kids’ cards, why not give “All in the Family” a go? This set is HUGE!! and you can customise your little persons… tee hee – so much fun.
You don’t *have* to use a Stamp-a-ma-jig to get perfect alignment; you can line up the body parts (EWWW sounds icky!!) fairly easily with a little practice. The great thing about the above image is that the legs, body and arms are all on one stamp and the head is the only thing which is seperate. (EWWW!) *laughs* The reason for this is that this particualr “body” stamp is for the toddler image so it is quite small. There is a baby body (you add the head!), toddler bodies (complete with arms and legs – no head!), child bodies (a little big bigger than toddler bodies, but no head, arms or legs!), and then you have bodies for either bigger children or adults – you simply add your choice of legs, arms and head! You can mix and match to create perfect replicas of your family!
I love that you can make peoples with long hair, short hair, curly hair, spikey hair, toddlers, babies, children, adults, you even have a cat and dog! If you get the Accessories stamp set you can even give your peoples tutus, teddy bears, sports equipment, picnic baskets and more!!
It’s seriously fun!
As you can see in this card, this little fella’s arms can be positioned however I want them… it’s just a matter of lining up the arm stamp with the body part stamp. The trick to good positioning is to start with the legs. That way, you can see the bottom of the rubber stamp and line it up with the stamped image of the legs and get it fairly perfect! You then build upwards and add the head and arms. As always, the best part is in colouring the images in – I don’t think I’ll ever grow out of colouring!!!
Did you notice the little trick I did with the Crimper? HAve a look at the white cardstock and you’ll see that a small section towards the bottom has ridges along it… that’s done with the Crimper. Nifty, eh?
(Too cute.)
Don’t you love the Bling!? You can create perfectly straight lines of glitter simply by adhering your Sticky Strip to your desired area, pressing down on it to ‘activate’ the sticky (it works best once heated by friction), peel off the red top layer and liberally cover with your desired glitter. Voila! Perfect straight glittered lines!!
All in the Family is a great set to have on hand for almost any occassion; babies, weddings, birthdays, parties, invites, family “portraits”, “from all of us” cards (you can customise the people and stamp yourselves!!)
XX
March 24, 2010
Magical Birthday Wishes.
I made it! I managed to do the shopping and get home in time to make the birthday card. If I hurry, I can upload it and still be on time for the school pick-up (woohoo!).
This is a Sneak Peak at a NEW stamp set from the Stampin’ Up! Autumn-Winter catalogue…. It’s called Pony Party and is a lot of fun to play around with and create many different-looking ponies and unicorns.
Awwwww – how cute is that pony? The beauty with this stamp set is that the wings, flowers/hearts/stars/butterflies etc… are all on separate stamps so you can play around with the pony and give her wings, a unicorn horn and add cute accessories to her rump. LOL.
I even stamped the trio of flowers onto the grass image to be flowers!
I coloured her in with ink and my Blender Pens. I wasn’t that happy with how the colouring turned out at first, but now that the whole card is assembled and the colours of the cardstock match the ink, I think I’m happy with it.
I bought the special Birthday Girl some craft supplies (and added a few items from my own stash, Tee Hee) and I want to make her a box to put everything in – if I manage to do it I’ll show you how it turns out. 🙂
XX
July 30, 2009
More Glitter Cards.
I made these small 10 x 10cm cards for a Fundraiser that me and my awesome buddy, Ju, went to last Friday night. We had one week’s notice and during that ONE week we madly prepared, cut, made, folded, stuck and glittered approximately 50 cards and 3D projects between us! *phew*. We had a lovely evening and enjoyed the company of the Gawler Soccer Club ladies. “Hello to anyone we met that night!!!”
These are some of the cards that I made for sale on the night…
I wanted a very simple layout and also wanted to see if I could use all the stamps in the Fun and Fast Notes set. (I used every image except the Christmas tree – although not all are photographed here).
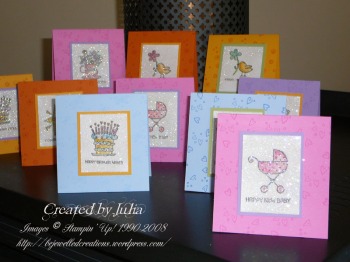
Glitter Cards Fun & Fast Notes
I used the Sprinkles set as a random background for the cards in the same ink as the base cardstock (or in the case of the light blue and yellow cards, I used a slightly darker shade of ink.)
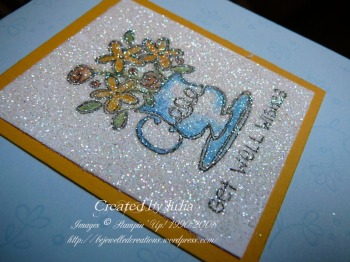
Glitter Card. Get Well
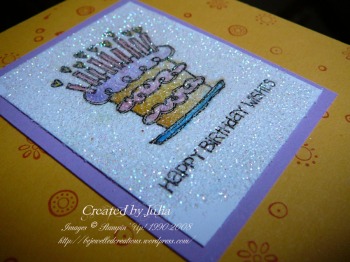
Glitter Card. Cake!
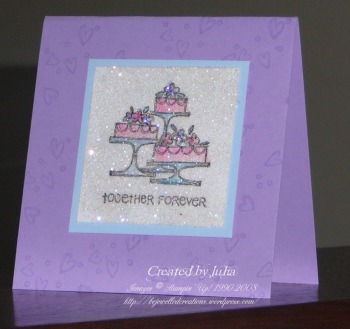
Glitter Card. Forever.
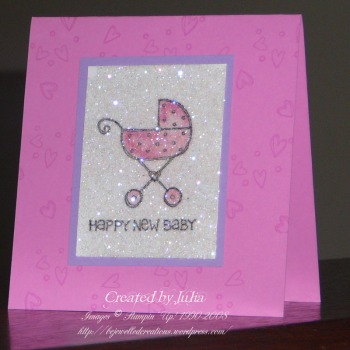
Glitter Card. New Baby
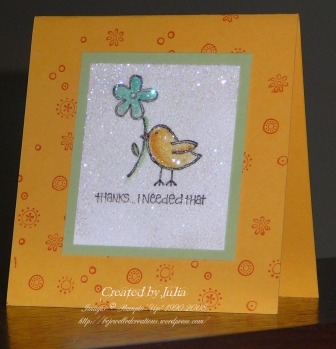
Glitter Card. Thanks
As you can see, making 10 x 10cm cards is easy and a great way to use up all the images in a stamp set. I chose nice bright colours for this set and I really like how they’ve turned out. This is definately a style I’d do again and may even try this design on a more traditional sized card to see how it looks (perhaps with a little embellishment if needed.)
If you’d like to learn more about this technique or see this made as a demonstration card at a workshop, please contact me and I can arrange this!
January 21, 2009
Continuing my “Scribble This” addiction…
When I made ~> this <~ card a few days ago, I knew I had to try to make a scrapbook page with the similar idea… so, I played around, and came up with this:
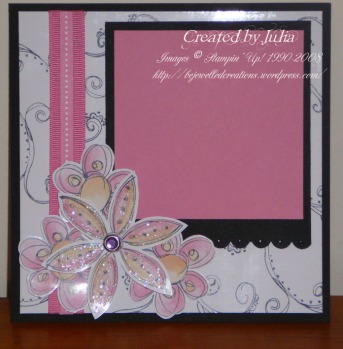
and its facing page…
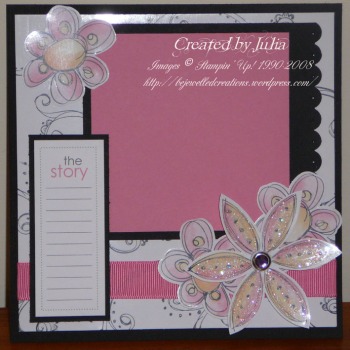
The flash has picked up the shine from the Glossy White cardstock – which is *SO* pretty!!
Originally, I was only going to use black and Regal Rose cardstock and ribbon (the same as the card), however when I was looking at it and deciding where to put things, it needed…. I don’t know…. something. I decided to add another colour to lift it slightly, and chose Apricot Appeal. I don’t think I’ve used Apricot Appeal before, EVER!
Supplies:
Cardstock: Textured basic black, basic black, Regal Rose, Glossy White
Ink: Basic Gray, Regal Rose, Apricot Appeal
Accessories: Regal Rose Grossgrain ribbon, scallop edge punch, matt pack, blender pens, dazzling diamonds glitter, 2 way glue pen, Rhinestone brads, dimensionals Die-cut stickers (Simply Scrappin’ kit)
PLEASE NOTE: If you haven’t tried colouring with Blender Pens on Glossy White – you’re MISSING OUT!!! Oh WOW! The Blender Pens run so smoothly over the Glossy White and never break down the cardstock like can sometimes happen on normal cardstock if you go over the same area too much. The Blender Pens colour in so easily and you can add depth by going over an area again to darken it. *SWEET*.
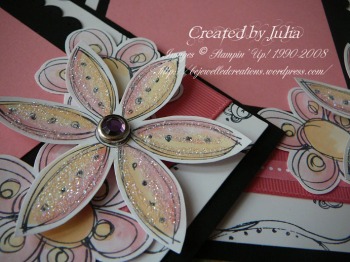
I pricked holes in the scallop edge of the black cardstock matting to match the dots of the Scribble This stamps, and added glitter to the main flowers only. I’ve put a Rhinestone brad in the centre of the large flowers (yes, I know they’re purple, but they “go“, you know?) and used die-cut stickers from the Crew Kids Girl Simply Scrappin’ Kit to finish the pages off.
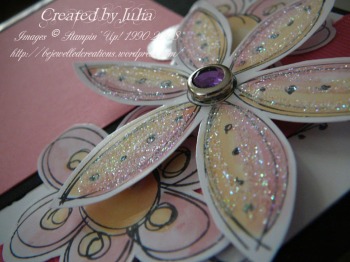
Tee hee – sorry for posting so many pictures – but I just loved making these pages and I’m really taken with this colour combo. *Le sigh* I know that I don’t have nay photos in the pages yet, I’m thinking of using black and white photos so that they don’t distract from the flowers, what do you think?


