June 24, 2012
A little bit of a Twist.
A very quick post today.
Using my much loved Apothecary Art stamp set and matching Big Shot Framelits – Labels Collection, here is a Twisted Easel card.

I’ve kept the colour palette to a minimum here – Marina Mist and Certainly Celery with Very Vanilla. (I really love the shine that the satin ribbon gives off.)
I hope it has a clean and fresh feel to it, at least I *think* it does anyway.
Here is the whole set for Apothecary Art – it’s really versatile, and while it’s PERFECT when you match it with the Framelits Labels Collection die, you can easily cut these images out by hand.

This is the Loving Thoughts set. I used the “Wonderful You” sentiment for my Twisted Easel Card, above.

Stamps: Apothecary Art, Loving Thoughts (both in the Autumn-Winter mini catalogue – out now!)
Cardstock: Very Vanilla, Marina Mist, Certainly Celery
Inks: Marina Mist
Other: Big Shot, Framelits- Labels Collection, Finial Press embossing folder, Certainly Celery Satin Ribbon, Boho Blossom punch, Basi Jewels Rhinestones, Snail, Dimensionals, Sticky Strip.
Thanks for visiting – have you stamped today?
XX Julia.
June 20, 2012
Bordering on Romance – Bordering on Beautiful.
This set is so pretty. *sigh*. And it’s so enjoyable to colour in too. Here, I’ve used Blender Pens and ink pulled form the lids of the ink pads.
Now it’s not just the children who can enjoy their colouring-in – you can too! I believe that even though the Blender Pens are used, that this is also called Watercolouring (which is weird ‘cos we’re not actually using water. LOL) I think it’s to do with the finished effect. Don’t quote me on it though or sue me, okay?

Don’t forget that you can use the VersaMark ink pad to use as a background colour on your cardstocks. You’ll notice the faint flowers on the Baja Breeze cardstock – that’s done with a VersaMark Pad.

Stamps: Bordering on Romance
Cardstock: Baja Breeze, Ruby Red, Whisper White
Inks: Baja Breeze, Ruby Red, Basic Grey, Old Olive
Other: Ruby Red Seam Binding, Blender Pens, Designer Buttons (Twitterpated) – Autumn-Winter mini, Linen Thread, Basic Jewels~Pearls
Thanks for visiting
X Julia.
June 17, 2012
Delicate Wings
Here is a card that the guests at one of my recent workshops made. Have I said that I love the Elegant Bird die? I’m sure I have… but I *really* do love it.

Images © 1990-2012 Stampin’ Up! ®
I love how easy it is to create different styles of cards with the one bird. The options are endless.
Stamps: Loving Thoughts (Autumn-Winter mini), Well Worn background stamp,
Cardstock: Marina Mist, Crumb Cake, Very Vanilla, Old Olive,
Inks: Crumb Cake, Marina Mist
Other: Big Shot, Elegant Bird Bigz die, Little Leaves Sizzlits die, Lots of Tags Sizzlits die set, Blossom Bouquet Triple Layer punch, Beau Chateau DSP, Vellum Paper, Basic Jewels Rhinestones, Glimmer Brad
Thanks for visiting.
X Julia
June 9, 2012
Dare to Dream
This is a new stamp set from the Autum/Winter Mini which is current till the end of July. This card uses a stamp from the set called Apothecary Art and is beautifully simple to use. What I just LOVE about it is that it has a co-ordinating die from Stampin’ Up that can be used in your Big Shot or Die Cutting machine.
Stamp the image first, then position the image on your Big Shot machine (facing up) on your cutting pad. Place the Framelit die – cutting edge down – over the top of your stamped image (it’s easy to line up!) and then cover with your top cutting pad. Easy Peasy!! And it looks professional too. ;o)

Images © 1990-2012 Stampin’ Up! ®
The sentiment (Dare to Dream) comes from the stamp set, “Loving Thoughts” which fits nicely with Apothecary Art.
I’ve made three other cards at the same time as this one as it was quite easy to make four in one go. They’re all using the same colour scheme and basic design, but all slightly different – I’ll post them later at some time.
Stamps: Apothecary Art, Loving Thoughts
Cardstock: Marina Mist, Certainly Celery, Very Vanilla
Inks: Marina Mist, Certainly Celery
Other: Big Shot, Framelits (Labels Collection), Finial Press
embossing folder, Rhinestones.
Thanks for visiting.
XX Julia.
April 4, 2010
Easter Wishes!!
Happy Easter everyone!
The Easter Bunny visited us this morning, leaving sweet treats for the children down amongst the gum trees in our back block… what a lot of fun it was watching the children racing from tree to tree to see if there were any tiny eggs hidden in the undergrowth.

Hunting for Easter Eggs
Earlier, we had a lovely lunch of Roast Lamb and yummy veggies (oohh I think I ate too much!!!) and we’re all ‘relaxing’ in our various ways – the children are outside playing, Shane’s in his shed and I’ve taken a quiet moment to upload some Easter cards…

Design by Julia. Stamped Images © Stampin’ Up!
Oh noooooo, now that it’s uploaded, I see that the photo quality isn’t as good as I thought – sorry ’bout that! *DOH!*
This card uses Wagon Full of Fun from the Summer mini (now retired), and the Bold Brights inks and cardstock – Real Red, Green Galore, Tempting Turquoise and Yoyo Yellow. Don’t you just love the glitter on the eggs? I’ve also embossed the top layers of cardstock with Polka Dots in the Big Shot.

Design by Julia. Stamped Images © Stampin’ Up!
This is such a cute duck. I’ve gone for a very clean and simple look here. Only Orange, Yoyo Yellow and Whisper White. I’ve coloured both the ducky and the eggs in the previous card with my Blender Pens and the ink pads.

Design by Julia. Stamped Images © Stampin’ Up!
I thought I’d use the Loads of Love accessories set and put a little pile of Easter Eggs on the window sill of the Window Dressing Hostess set. Cute.
GAH – the quality of the photos is awful! I’ll see if I can get better shots and edit this later for you.

Design by Julia. Stamped Images © Stampin’ Up!
Again, I’ve kept the design very simple and the colour scheme is minimal. If you can just make it out, I’ve embossed the Whisper White cardstock with Polka Dots. If you like the bow on the top right hand side, I learnt how to make it by following Teneale Williams’ instructions. You’ll have to check out her blog for her Tutorial on how she makes her perfect bows. Stunning!!
I hope you had a wonderful Easter Sunday and that the Easter Bunny brought you a little something too. Yum.
Julia. XX
Sizzix Big Shot

© Stampin’ Up! 1990-2010
I also used the Extra Large Two-Step Bird punch to embellish the front Top Note. All you need to do is punch the Bird Punch through three different colours of cardtsock and layer them however you please. You’ll end up with three of each image to play around with! I’ve bound the Top Notes together with a Jumbo Eyelet and a ringbinder to use as my sample of the Top Note die to show Workshop guests.
Julia xx
April 3, 2010
Razzleberry Birdie!
This card has an interesting history…….

Design by Julia. Stamped Images © Stampin’ Up!
I made it for some friends to let them know that I was thinking of them, however, I soon learnt that the reason for which I’d felt the need to make them a “thinking of you” card was not as dire as everyone had at first thought. (YAY!!!)
Now I had a dilema…. my friends had received good news (after worrying news), and therefore it wasn’t REALLY necessary to send them this card…. but I’d made it with them especially in mind, and it was soooo pretty and I knew that the recipients would appreciate the card – well, one in particular LOL!
Should I send it?
Tee Hee – I still sent it, but luckily I hadn’t written in it yet so I could thank them for creating an opportunity for me to make them a card – although I reckon they went a bit over the top just to get a card from me – they could have just asked!!!!! *snort*
I love the simplicity of this card. Clean and crisp. I’ve sponged the edges of the Orchid Oppulence cardstock to make it look softer and the stamped saying is from the Sale-A-Bration set Whimsical Words.
Cardstock: Rich Razzleberry, Orchid Oppulence and Old Olive.
Ink: Rich Razzleberry, Orchid Oppulence (sponging).
Other: Sizzix Big Shot, Top Note die, Extra Large Two Step Bird punch, Clear Rhinestones, Mat Pack, Stampin’ Sponges.
Please feel free to comment!
Julia xx
April 2, 2010
Such a pretty Cottage Garden…
I’ve always wanted a Cottage Garden. I just love the mass of sweet smelling flowers, but alas, I live where it’s very dry and our soil is quite sandy. The best things that grow around here are native gum trees and shrubs – all very lovely, but not quite the same. I’ll have to settle for a very LOVELY stamp set from the Autumn-Winter mini catalogue instead (I think I can manage that!!!)
Here’s a card I made with the Cottage Garden stamp set and its matching Cottage Wall DSP (Designer Series Paper). The white area of the card is actually part of the paper pettern – SO pretty. I just adore this paper…. hmmm… wonder what hubby will think of me redecorating the bedroom with this paper?? LOL.
The three large flowers on the card have actually been stamped onto Whisper White cardstock and trimmed before adhering to the card. I’ve achieved the different tones of ink by simply ‘stamping off’ three times before re-inking the stamp – this gives a lovely soft look to the subsequent images.

Design by Julia. Stamped Images © Stampin’ Up! 1990-2010
Look closely and you’ll see a clear pillow box with tags inside – this was made with Window Sheets (acetate) and the Big Shot with my Pillow Box die. It’s so easy and quick to make multiple boxes and because its quite small, it doesn’t take much to decorate the outside. Of course, if you made the pillow box out of patterned paper, you wouldn’t even need to decorate the outside so it’s a real time-saver for a quick gift box.
Julia XX
April 1, 2010
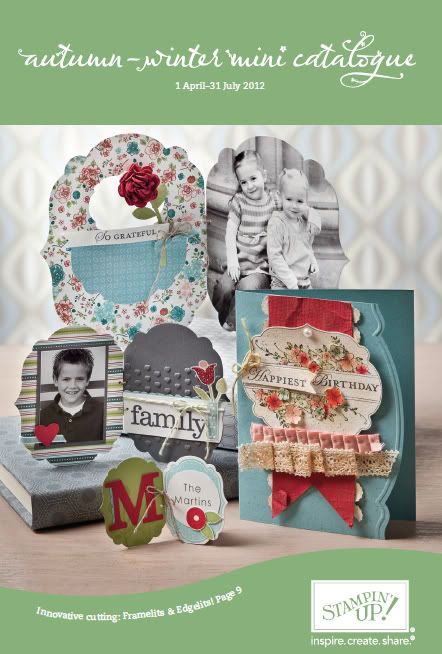
WooHoo! Happy New Catalogue Day!!
The long wait is over – the NEW Autumn-Winter mini catalogue is now available!!!
There are so many fun and cool products and stamps in this mini – I think it’s one of the best yet!
A few items that you’ll find in the mini, are:
THE BIG SHOT!!

Big Shot die-cutting system.
There’s a new big shot in town–the Sizzix Big Shot for Stampin’ Up! The Big Shot is a sturdy manual die cutting system used to die cut materials for use on crafts, home décor projects, and even clothing–it’s a big deal! You can cut felt, denim, chipboard, metallic card, vellum, self-adhesive felt, self-adhesive glitter paper and much more!! The possibilities are endless!! You’ll love what the Big Shot machine can do for you.
It’s important to note that there are different types of dies.
- Originals, Bigz, and Bigz XL dies. These steel ruled dies cut through virtually any material and multiple sheets of card stock and Designer Series paper.
- Sizzlets dies. These dies are small and detailed, often creating scored or perforated details. These dies cut through thin materials, and multiple sheets are not recommended.
The Big Shot really does make it easy to create multiple die-cuts or embossed cardstock for all your cards and scrapbooking. I’ve really enjoyed playing with it so far! There are some lovely dies and two Embossing Folders that can add Jazz to your cards.
CLEAR-MOUNTED STAMPS
Clear-Mounted Stamps & Blocks
Recently, Stampin’ Up! has had a huge demand for a line of repositionable clear-mount rubber stamps. Well, you asked for it, and now you have it! Starting with stamps in the 2010 Autumn-Winter Mini Catalogue, Stampin’ Up! now offers our exclusive stamp art in both traditional wood-mount, and the new clear-mount option.
Our new clear-mount rubber stamps are the result of extensive research with the intent to maintain the very best image quality in the stamping industry, while at the same time offering the ease-of-use and storability inherent in repositionable clear-mount rubber stamps.
Clear-Mount Rubber Stamp Features:
- Nine different sizes of clear blocks available individually or as a discounted bundle.
- Blocks have ergonomic grooves on all four sides for easy grip and traditional wood-mount feel.
- Stamps and blocks are durable and easy to clean with your Stampin’ Scrub and Stampin’ Mist.
- Optional image labels on stamp backs let you decide if you want to see the image through the block or not.
- Tight die-cutting for easy image positioning.
- Large clear blocks can be used to create collages or spell words with alphabet sets.
- Stamps store easily in standard, DVD-type cases with artwork on front and spine, making organisation easy.
Clear-mount stamps are a new option for high-quality rubber stamps from Stampin’ Up! This new option offers a compact storage solution and is great for those who prefer repositionable stamps with fewer blocks. They work out to be between $5 to $10 cheaper than the equivalent wood-mounted stamp set so can be a very cost-effective way to continue your stamping addiction without breaking the bank!!!
Stampin’ Up! will continue to carry all of the stamps in the wood-mount option. While one stamper may prefer wood-mount, another may prefer clear-mount, and still others may prefer a little of both. The best option is whatever fits your needs best!
NEW PUNCH DESIGN

New Punch Design
This new style of punch design offers a larger cutting surface and sleeker body which will give you greater precision in cutting, better punching leverage and space-saving storage!!
The most exciting (well, I think so anyway!!) new punch is a Two-Step Punch. The Extra-Large Two-Step Bird punch is amazing! With it, you can cut more than one image with each “punch”. This particular punch will punch out a bird’s body, a bird wing and a tree branch. SO CUTE!!! Punch out a few different colours of cardstock and simply layer the different colours to create a very quick and easy birdie accent. I love this one!!!!
*******
These are just some of the NEW cool products that you’ll see in the Autumn-Winter mini. Keep checking back here as I’ll be uploading cards and projects made with these new items and many other stamps from the catalogue.
(I’d better run off and be creative!!)……………………………………………………..
Julia xx
March 31, 2010
Male Birthday Card
It was my brother’s and nephew’s birthdays last week, so I thought I’d share with you the cards I made. This is the card for my brother:

Design by Julia. Stamped Images © Stampin’ Up! 1990-2010
I started with the patterned paper (Windsor Knot DSP) and pulled the colours from that to use for the cardstock and inks (Sage Shadow, Old Olive, So Saffron and Chocolate Chip).
The stamp is from the Sale-a-Bration set Happy Moments – which is very cute. This stack of birthday presents has come in very handy for masculine birthdays. I stamped the image a couple of times on co-ordinating patterned paper and cut out the presents I wanted, and glued them over the stamped image – this saved colouring in all the presents!
You can just about see the Polka Dots embossed cardstock – that’s made with the Sizzix Big Shot which is available as from tomorrow!!! WooHoo!!
This next card is a fun boy’s card. My nephew turned 12 during the week (gosh, getting so grown up!!), but I thought he’d still appreciate the fun of robots. Twelve is a tricky age – not quite old enough for being “really cool”, but too old for really childish cards. I’ve used a NEW stamp set here, Lots of Bots from the Autumn-Winter mini. Here’s my effort anyway.

Design by Julia. Stamped Images © Stampin’ Up! 1990-2010
Here’s a closer look. I used the Polka Dots embossing folder and also die- cut the numbers with my Stampin’ Up! Medium Sizzlits “Timeless Type Junior Alphabet” die and my Big Shot. A quick turn of the handle and I had these PERFECT numbers! It couldn’t have been easier.

Design by Julia. Stamped Images © Stampin’ Up! 1990-2010
I stamped the inside too. The paperclip is to hold some money!

Design by Julia. Stamped Images © Stampin’ Up! 1990-2010
I think the Lots of Bots stamp set will get a fair bit of use…. it’s great for boy cards and also ‘fun’ cards. The colours for the robot card are; Pacific Point, Kiwi Kiss (both current In-Colors), and Tempting Turquoise (with a splash of Tangerine Tango for some of the robot detail.)
XX